DIY: Build Your Own M14E2
November 9th, 2023
10 minute read
Rare and sultry, simultaneously utilitarian and cool, the elusive M14E2 was designed to be a squad automatic version of the esteemed M14 service rifle. In years past, the closest you could get to one of these unusual firearms was by perusing the pages of some moldy old gun book.
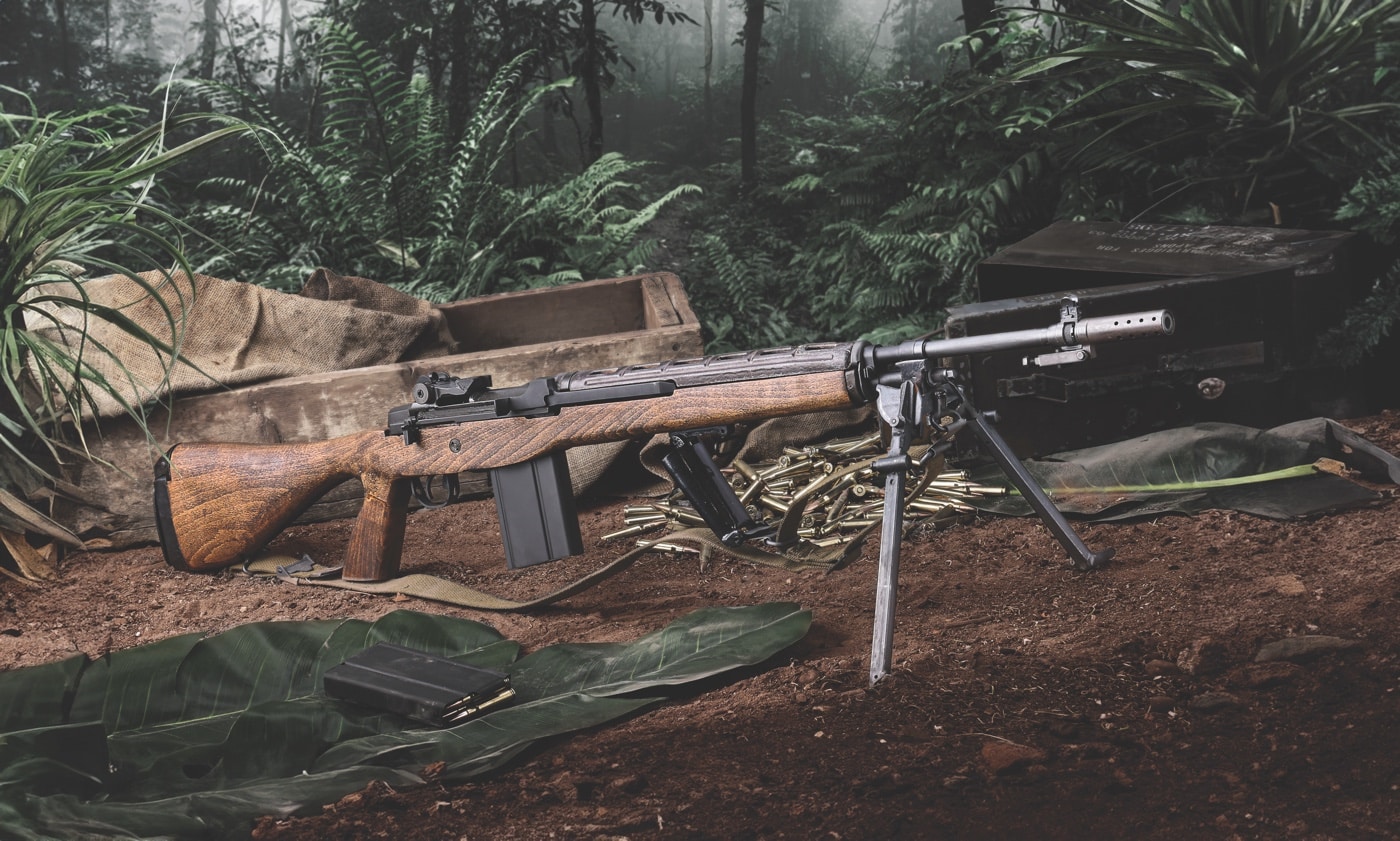
However, now thanks to SARCO, Inc. as well as Springfield Armory, an M14E2 of your own is within reach — that is, if you’re reasonably handy with tools.
The M14E2 Unicorn
Small arms evolve over time. The pressures of congressional budgets combined with the crucible of combat drive mechanical adaptation to ideally produce an improved product. Sometimes the result is something like the paradigm-shifting German StG44. Other times it’s the ambitious but dead-ender WWI-era French Chauchat.

For me, the M14E2 sits somewhere in the middle. It may be a “failure” due to the fact it wasn’t widely adopted and did not achieve its intended aims, but it’s also weirdly cool. Add in the fact that in the past the M14E2 was unobtainium, and it makes it just about irresistible.

But how did the M14E2 in all its wonderful weirdness come about? With the development of the M14 from the classic John Cantius Garand-designed M1, what you had was the ultimate iteration of the revered rifle. Chambered for the new 7.62 NATO round, select-fire and fed by a detachable magazine, the M14 addressed all the relative shortcomings of the admittedly exceptional M1.
The M14 was originally envisioned as a one gun-does-everything replacement for the M1 rifle, the M1 Carbine and the M1918A2 Browning Automatic Rifle (BAR). The appeal of simplified logistics was likely a driving force behind this plan. However, the 7.62 NATO round is a large, powerful cartridge that is hard to control in full-auto fire from a rifle like the M14.

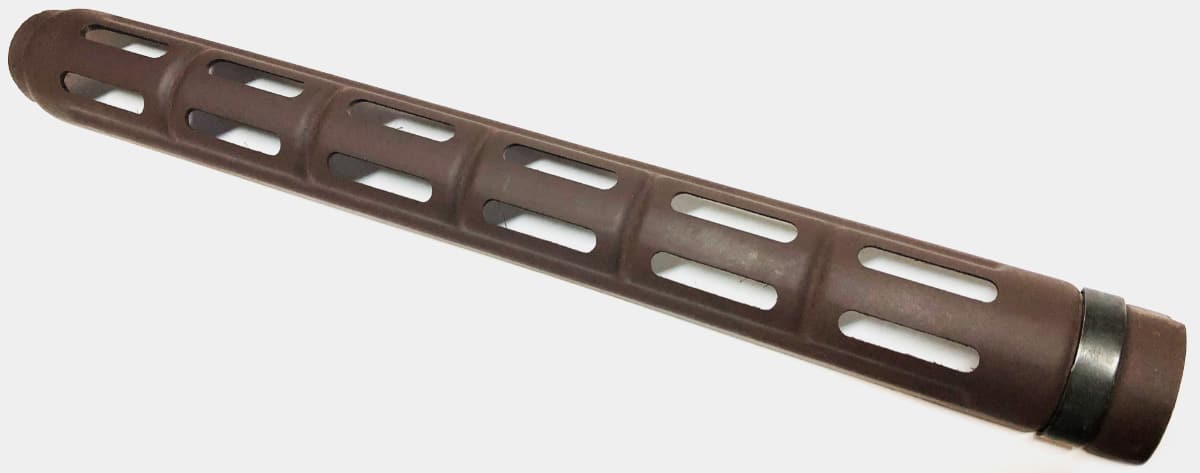
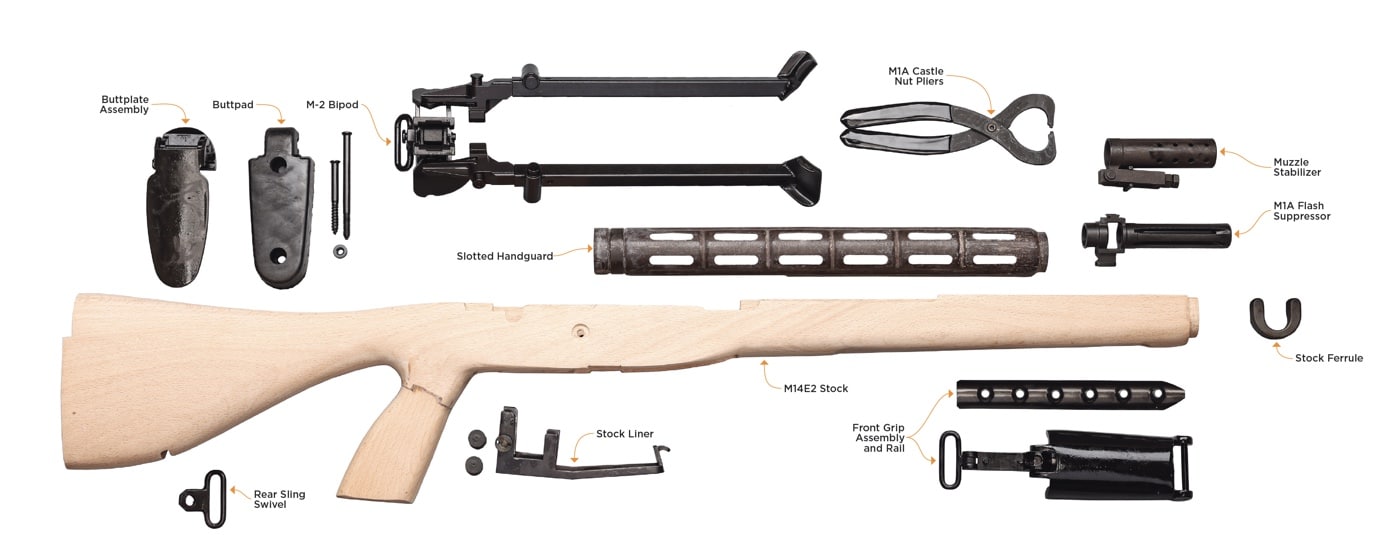
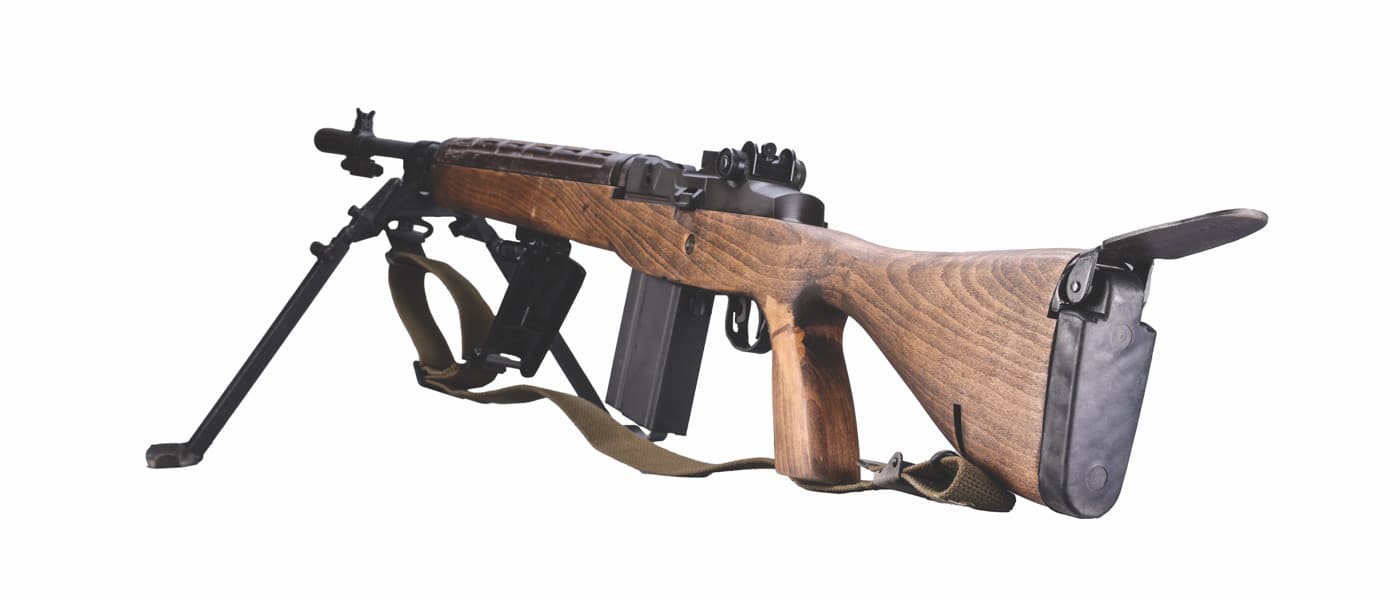
To address this, the M14E2 was developed. Its wooden stock included a vertical pistol grip, a folding front grip, and a rubber buttpad under a flip-up steel buttplate, all designed to help tame the rifle’s recoil under full-automatic fire. It also included a robust steel bipod as well as a muzzle stabilizer that slipped over the original slotted flash suppressor. A slotted synthetic handguard helped facilitate barrel cooling.
The end result looked about as awkward as some mad scientist’s hybridized duck-monkey. However, the gun fits the human form beautifully and runs like a scalded ape. So, if you’d like to build up a semi-automatic M14E2 “clone” of your own, the voyage begins with sourcing the parts.

Unfortunately, Uncle Sam only made around 8,300 of these strange hybrid rifles, and many of them were gobbled up in combat in Vietnam. Original buttstocks and parts on the civilian market were few and far between, with commensurately high prices. Enter SARCO, Inc.
[For more information on the M14 in the Vietnam War, click here.]
SARCO: A New Source
Anyone with a passion for surplus military guns and gear knows the name SARCO well. The company was incorporated way back in 1962 by Cholly Steen, III, and the name stood for “Steen Armament Research Company”. SARCO would become renowned for digging up some of the most unique and rare military surplus gear available from around the world.
But, by its nature, the business of acquiring and selling surplus material is directly affected by the availability of the products. As compared to sourcing parts of widely made military products, supporting the demand for more rare items can be difficult. Add to that the effects of time, with each year making even the most common parts more and more scarce, and you have quite a hill to climb. As a result, SARCO would eventually find itself also in the business of manufacturing to support the demands of its wide range of customers. Which brings us back to the topic at hand.
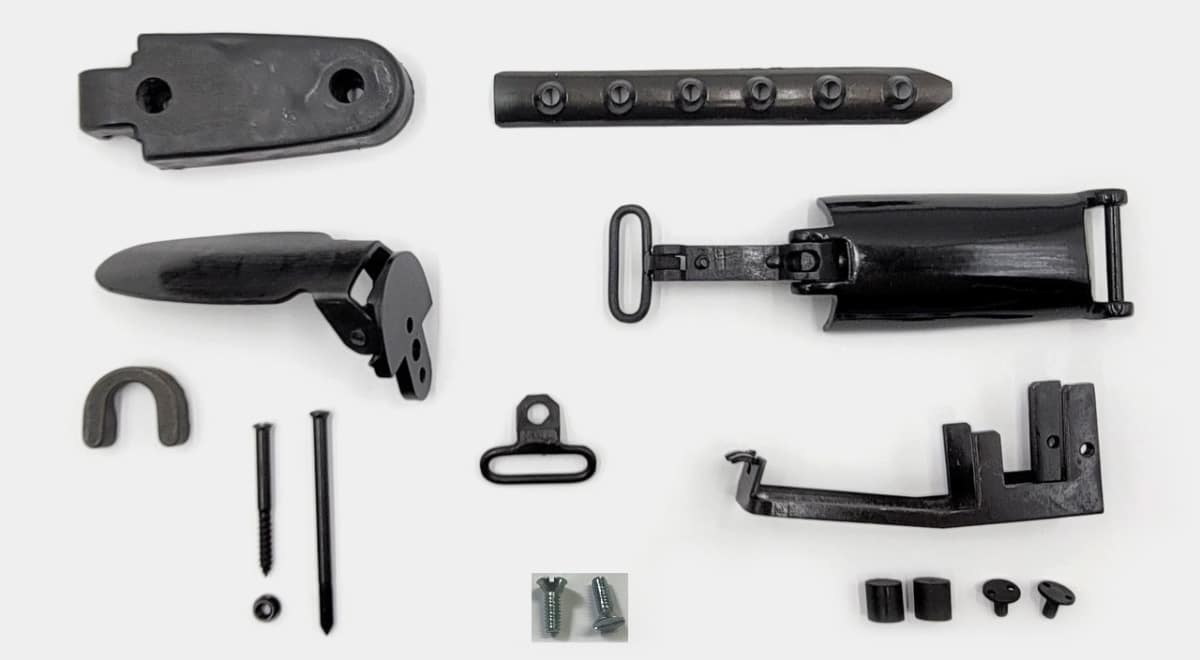
The M14E2 is a perfect example of the type of product that SARCO would support, but its extreme rarity limits the availability of parts. So, the company decided to address this by having new parts made to help collectors and enthusiasts build their own semi-auto M14E2 rifles. If you have a rifle like an M1A for the build, they offer practically everything else you need. This includes a new stripped stock, a new stock hardware set including a new front grip assembly and rail, and an original slotted handguard.
[Need a new M1A stock, but not wanting to do a full M14E2 build? Check out the Top 5 M1A Stock Systems.]
M14E2 Build Parts
Building up your own M14E2 clone is a DIY home project of modest complexity. I’m comfortable around tools, but I’m not a professional gunsmith. If you struggle to change the oil in your car, you might want to sit this one out. However, I am living proof that you can successfully build up this rifle with nothing more than a Dremel tool, a power drill and patience. The end result will set you apart at the range, and it’s a really satisfying way to kill a lazy Saturday afternoon.

In addition to the SARCO parts, I acquired a “Standard Issue” Springfield Armory M1A with a synthetic stock. I binned the stock and used the basic barreled action as a starting point. You’ll need a flash suppressor with a bayonet lug to secure the muzzle stabilizer, but Springfield Armory offers that for sale on the Springfield Armory Store for those that can legally install it on their rifle. Be sure to check your local laws.
The OD canvas sling from the Springfield Armory Store is a good fit for this project. To use it on the M14E2, you rig it backwards. The sliding keeper goes on the rear, while the Parkerized hook locks the front grip in place. The Springfield Armory Store also offers the M-2 bipod, which is a great fit for this project. The bipod is rugged steel with a Parkerized finish. Press a button on the side to deploy or stow each leg. The legs are readily adjustable for command height. Read our M1A bipod review for more information.
The SARCO M14E2 stock is stripped and unfinished, but beautifully executed. Original stocks were cut from birch, which is both hard and durable. SARCO had theirs made from American beech, which is even more so. I found the quality to be superb.
The SARCO M14E2 stock hardware set includes the front grip along with the internal mounting rail and installation screws. While the screws in the kit are 3/8, I found them to be a little short and sourced a pair of 10-24×1/2 screws at my local hardware store. Like the originals, the grip folds fore and aft as desired. The original G.I. field manual made it clear that the foregrip was meant to be supported by the sling, not its mechanical latch.

Other parts in the stock hardware set include the buttplate with pivoting shoulder rest, rubber buttpad with plugs, front ferrule, and rear sling swivel along with mounting hardware. Some of this stuff is original, but much of it is newly manufactured. Quality, like that of the stock, is unimpeachable. SARCO also offers original distinctive synthetic slotted handguards as well.
That left a false selector switch and slip-on muzzle stabilizer for me to find. Google is your buddy for those last two items.
M14E2 Parts List
- SARCO M14E2 Stripped Stock: $165
- SARCO M14E2 Stock Hardware Set: $160
- SARCO Original Slotted Handguard: $50
- Springfield Standard Issue Composite Stock M1A: $1,770
- Springfield M1A Flash Suppressor: $52
- Springfield OD Green Sling: $23
- Springfield M-2 Bipod: $171
- Springfield M1A Castle Nut Pliers: $27
- Muzzle Stabilizer: $80
- False Selector: $50
- TOTAL COST: $2,548
Retiring to the Workshop
One of my mandates in undertaking this project was that it be done with the sorts of tools normal people might actually have. If it takes a cold fusion reactor and a 12-axis CNC mill slaved to an ENIAC supercomputer, then this gun might as well be located on Mars. I wanted to prove that a normal dude with normal mechanical proclivities could pull this off. You’ll need a Dremel tool. If you don’t already have one, I sure wouldn’t admit that to anybody.
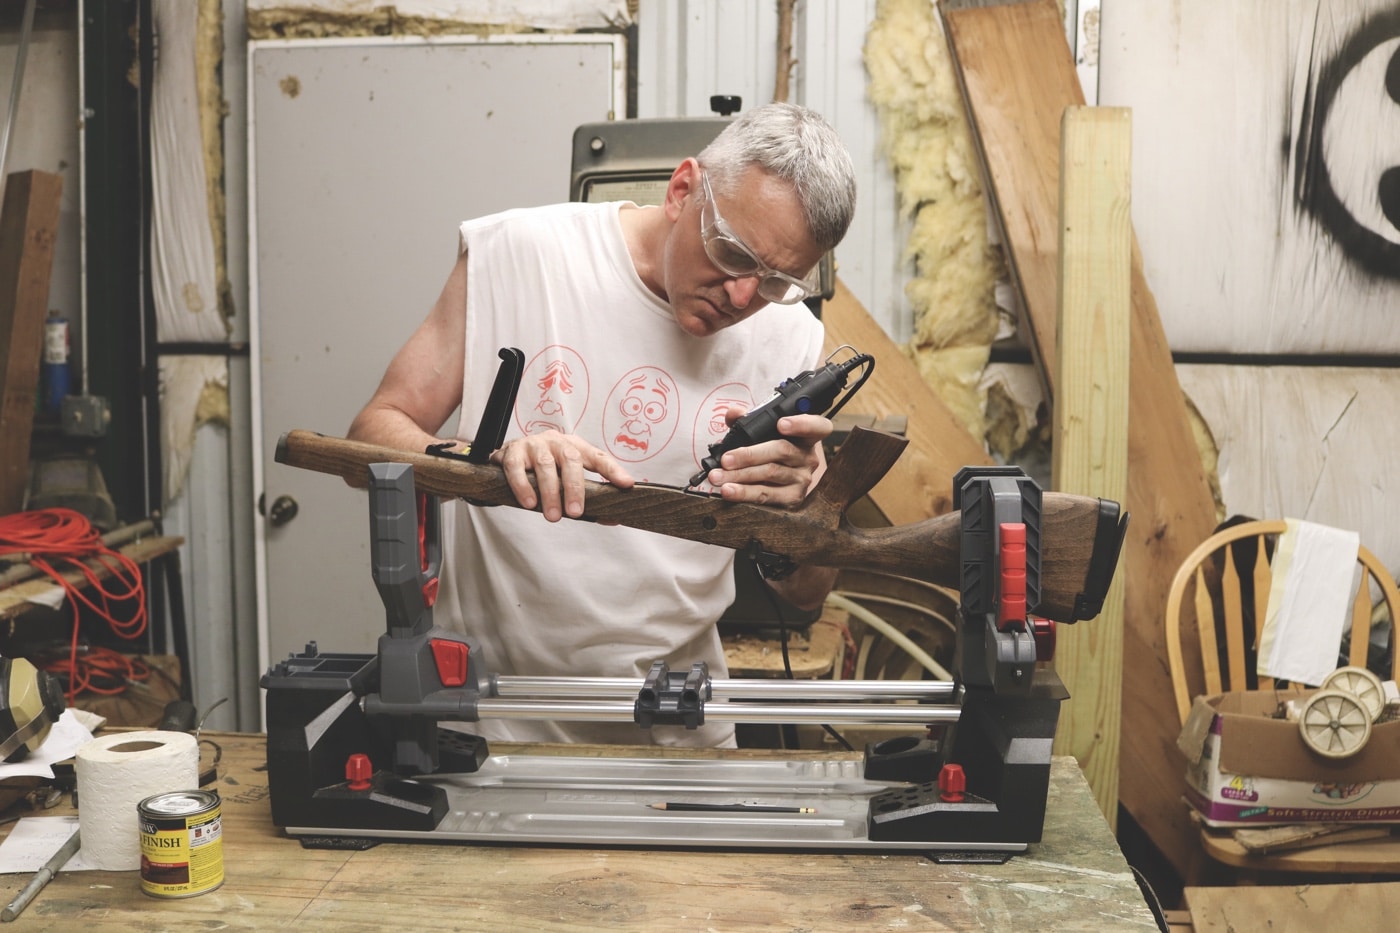
The SARCO stock is intentionally tight in places. You’ll need to strategically tweak the wood back in places to get the components to fit. Remember that it is way easier to take material away than it is to put it back, so take your time.
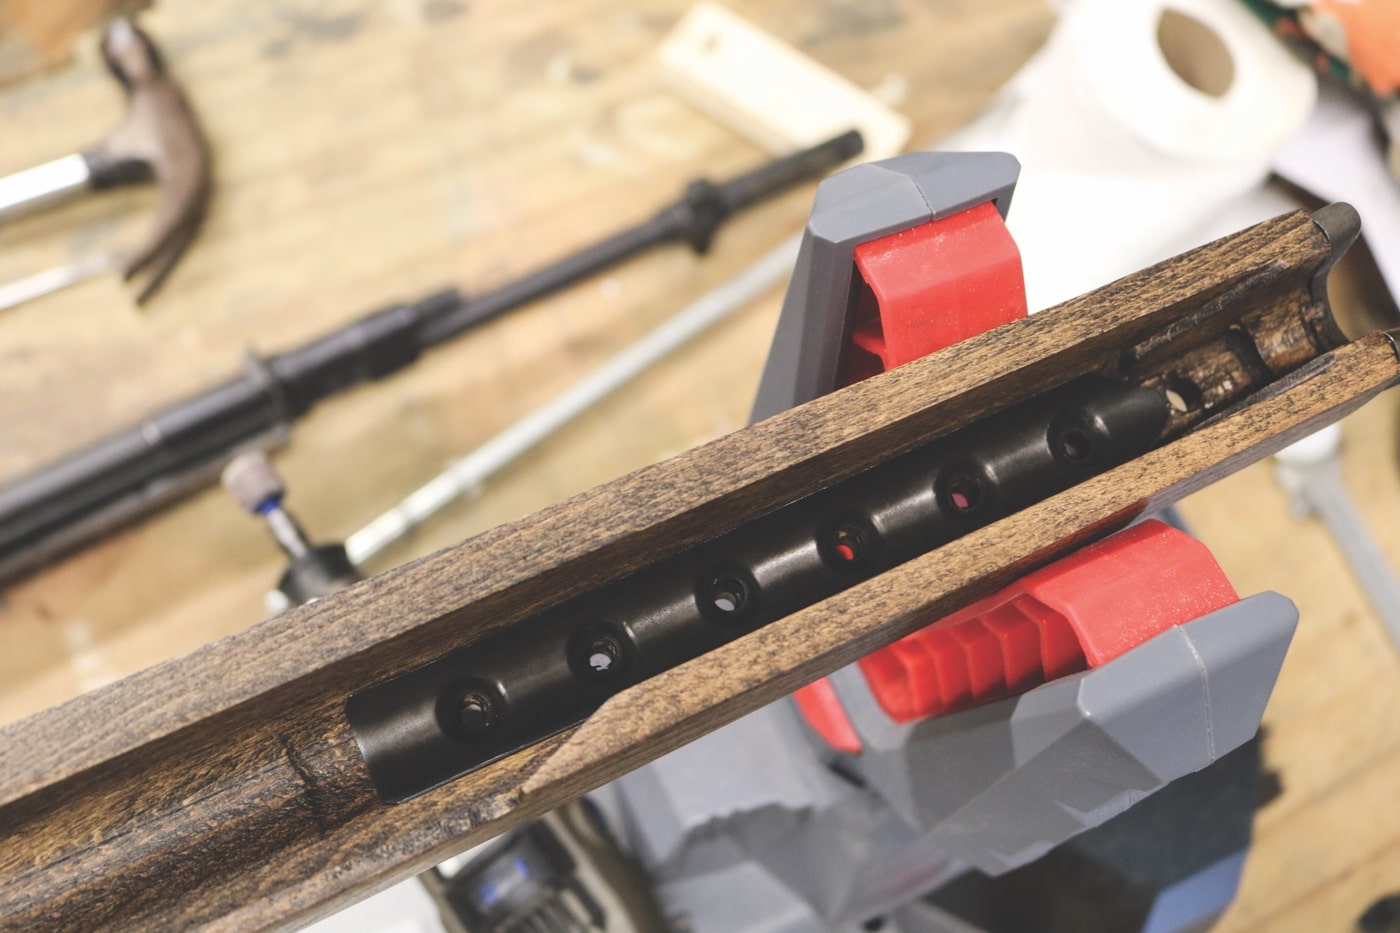
There is a steel insert that fits inside inlets in the stock to support the rifle chassis. I had to shave the front edges of the steel insert back just a bit to get it to accept the M1A receiver legs. I suggest fitting the insert to your action before mounting it in the stock. It should slide in and out readily without being loose. I found that a cutoff wheel on the Dremel worked fine. Wear safety glasses throughout unless you want to rock a cool eyepatch.
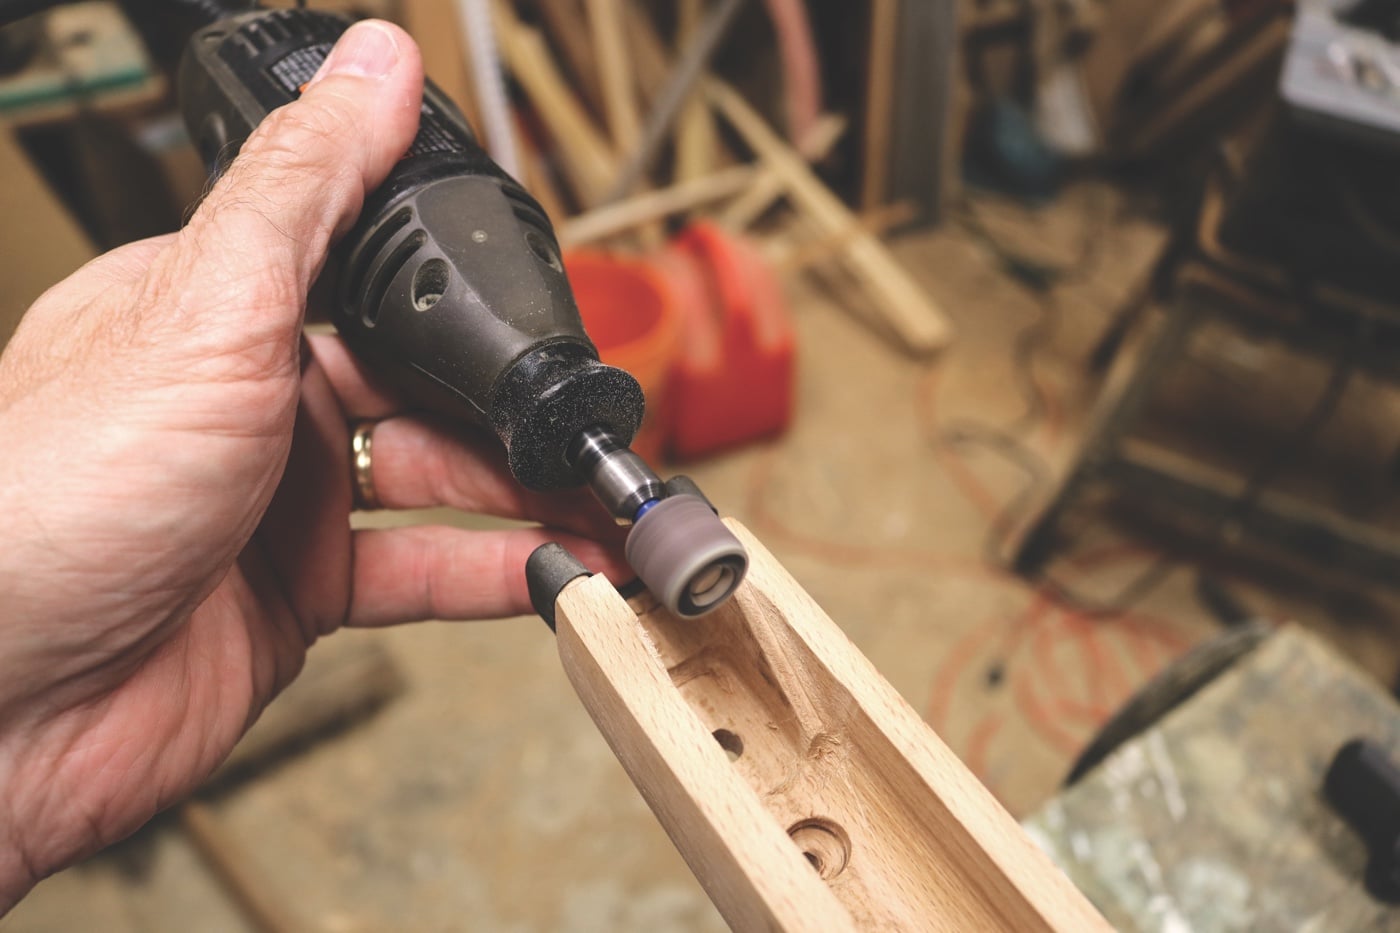
Fitting the steel insert into the stock was the most tedious part of the build. I shaved a bit of wood back on the forward part of the magwell and then fit the insert, repeating as necessary until it finally snapped into place and aligned with the holes. I had to gently bend the insert and take my time with the Dremel, but the end result is rock solid. Just slowly tease back the front bit of the magwell with your Dremel until the length is right.
The steel insert is held in place via two-hole proprietary fasteners. Brownells sells an appropriate driver bit that will fit in a standard screwdriver. However, I’m cheap, and I wanted to complete this project with a minimum of extraneous expense. I just measured the distance between the holes in the fastener and sank a couple of nails that far apart in a scrap of wood. The resulting improvised franken-tool wouldn’t do more than a couple of bolts, but it worked fine for this project and cost me literally nothing.
The steel front end cap on the stock is called a ferrule. The originals were crimped in place at the factory. I had to tweak the front of the stock back just a hair with a sanding drum on my Dremel to get the cap to fit, and then secured it with a little JB Weld epoxy. It will remain in place until the sun burns out.
Fitting the barreled action to the stock, I took my time and identified the tight spots via trial and error. Aside from fitting the insert, the only real trouble area was the front of the stock where it accepts the gas cylinder. I used a sanding drum to relieve this area to about the same geometry as the ferrule for a consistent tight fit. Drop the action back in place and repeat as necessary until everything jives.
I had to do some significant adjustment to the area around the selector switch hole with the Dremel to get the fake selector to fit, but that’s not too tough. Settling the action in place took a while but resulted in a factory-tight interface between wood and steel. Once I had everything fitted, I stripped the stock back down and stained it with walnut oil stain.

Final assembly requires little more than a screwdriver. I did a little tweaking and final fitting with the Dremel as I found a few spots that needed some extra work. But basically, I was done. Just to be on the safe side, I had a local gunsmith look over the gun to ensure everything was good to go. Once he had cleared it, I got it out to the range and found it to be a very fun gun to shoot. The extra mass combined with the compensator, pistol grip, forward grip and overall solid foundation conspire to make it a delightful shooter.
Final Thoughts on Building an M14E2 Clone
You could make this project way more complicated by glass-bedding the stock. However, that wasn’t my mission here. This is a shooter-grade, semi-auto reproduction of the rare 1960’s-era M14E2 squad automatic created with the help of SARCO, Inc. The end result is utterly reliable, fun to run, and sets me apart from my peers. The fact that I made it myself offers a little extra special pride of ownership.

Once you add everything up, this admittedly isn’t a cheap project. However, it’s not stupid expensive, either. If you’re fairly handy with tools, then fire up your Dremel and build up an M14E2 of your own. It cost me a single Saturday. Getting there is indeed half the fun.
Editor’s Note: Please be sure to check out The Armory Life Forum, where you can comment about our daily articles, as well as just talk guns and gear. Click the “Go To Forum Thread” link below to jump in and discuss this article and much more!
Join the Discussion
Featured in this article
Continue Reading
Did you enjoy this article?

 341
341


