“If you or a loved one has suffered due to snappy recoil, you may be eligible for compensation.” Or so the late-night ambulance-chaser commercial might begin. Well, the good folks at Springfield Armory believe that we are all eligible for compensation… or make that a compensator. And we don’t even have to prove damages!
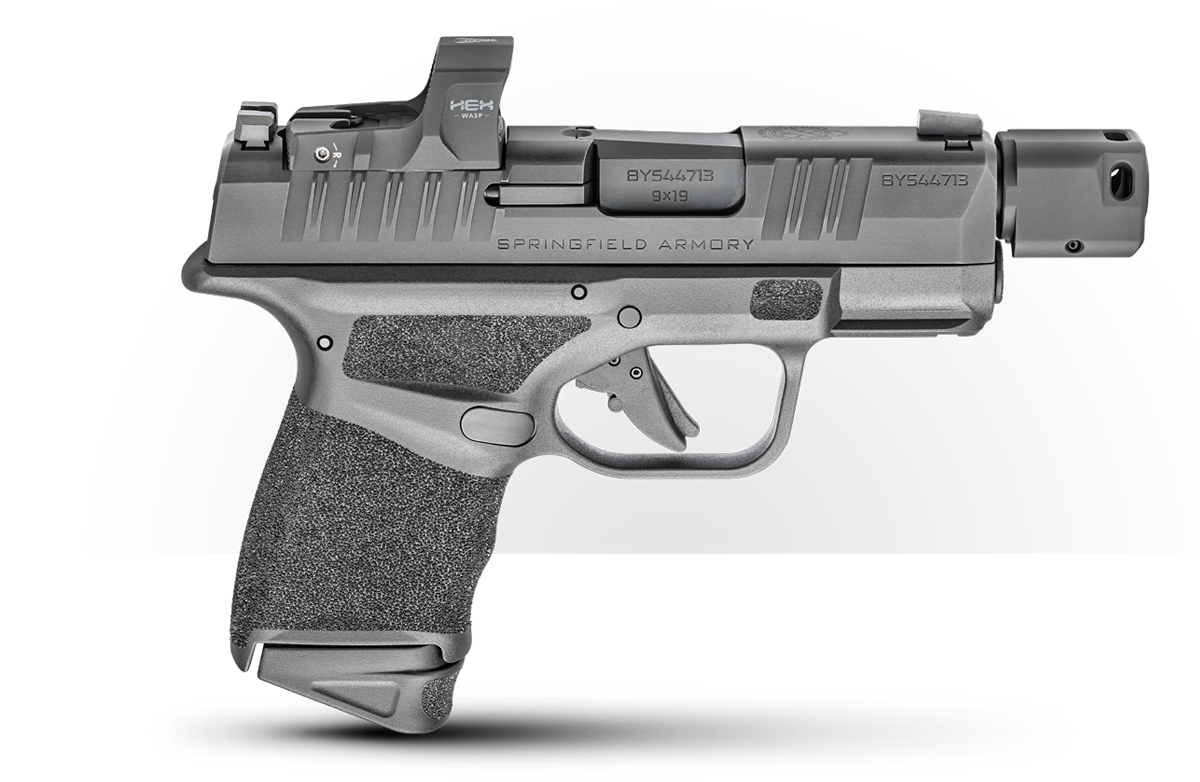
As the Hellcat continues to one-up the competition in the micro-9mm marketplace, the newest offering — the RDP — comes equipped with a compensator that is designed to reduce the recoil impulse of the handgun. The comp is a proprietary design that does not require any tools for assembly and disassembly and is constructed of anodized aluminum that beautifully matches the finish of the slide.
In this article and companion video, I will take a detailed look at just how the design works, talk about the right way to assemble and disassemble it from your barrel, and take a real-life look at the difference it makes in live fire — and see if it actually does what it claims to do.
The Details
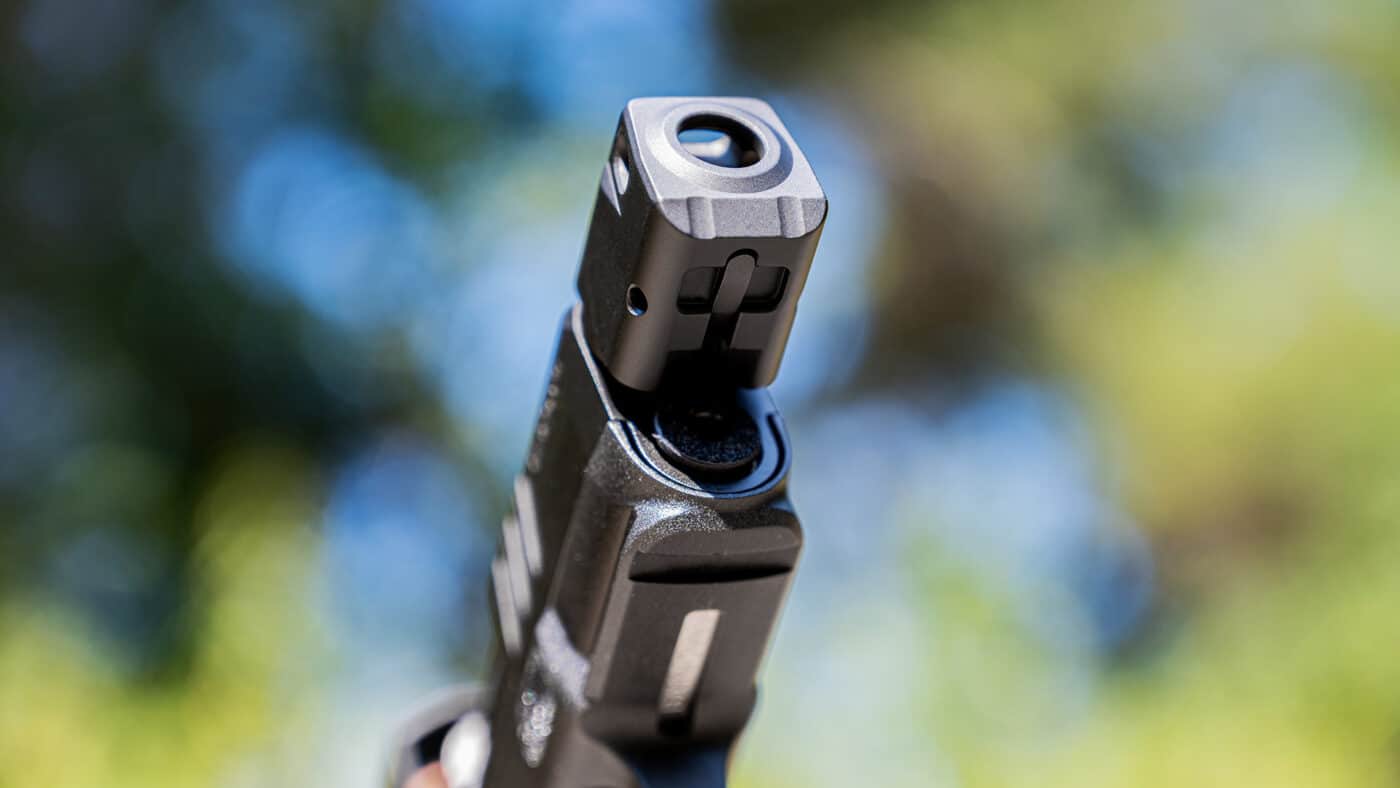
The Self-Indexing Compensator of the RDP has one hole at the top of the comp to direct hot exhaust gasses directly upward. There are two companion ports on the left and right of the unit that help relieve the pressures caused by the short barrel and also direct the gas in an upward direction.
It all works because of the subtle angles and placement of the openings. The hot gasses take the path of least resistance, and because every action causes an equal and opposite reaction, gas being pushed up puts downward pressure on the muzzle of the gun. The result means a theoretical reduction in recoil impulse to the shooter. How much reduction varies based on many factors, but a rule of thumb is that the hotter the ammo, the more the benefit from a compensator.
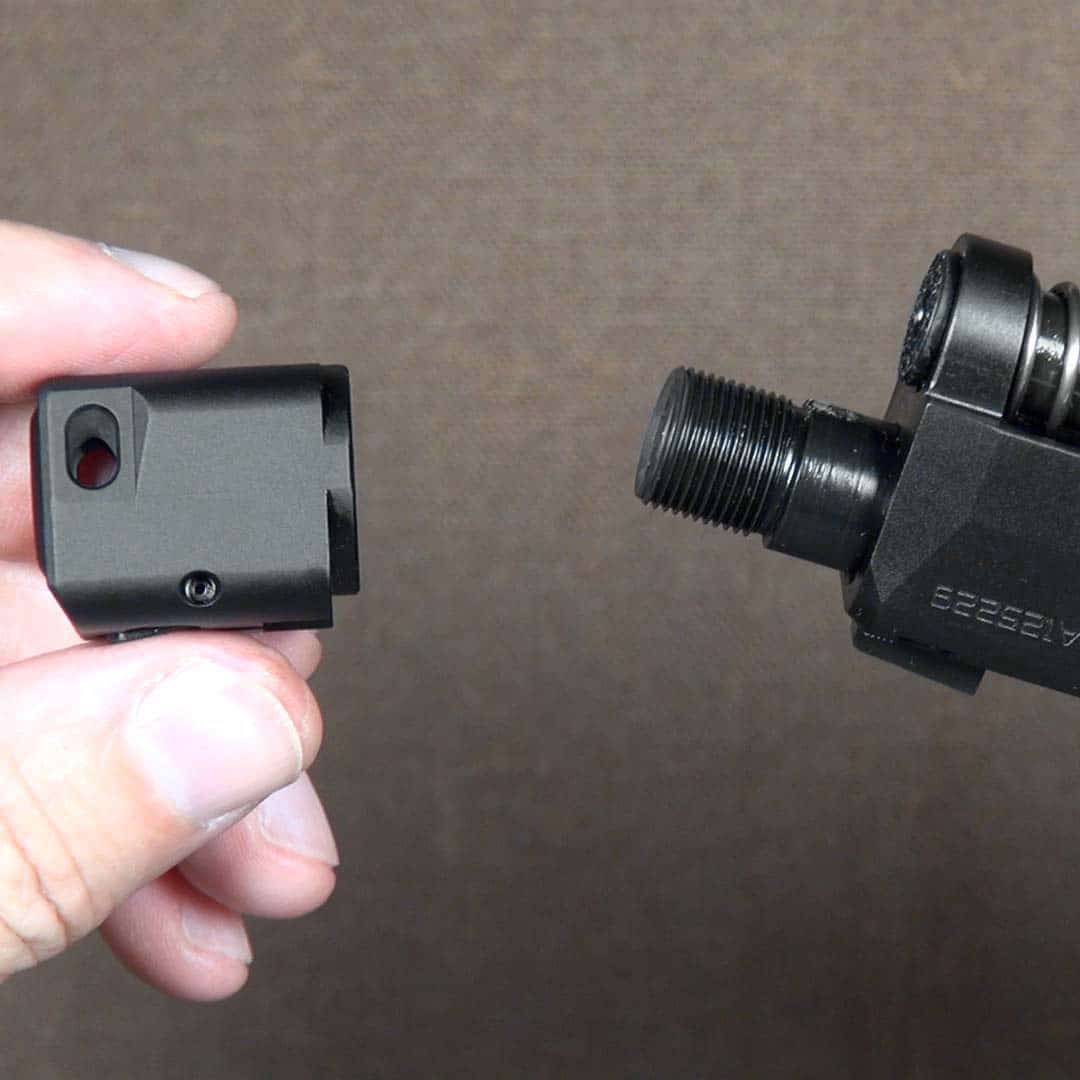
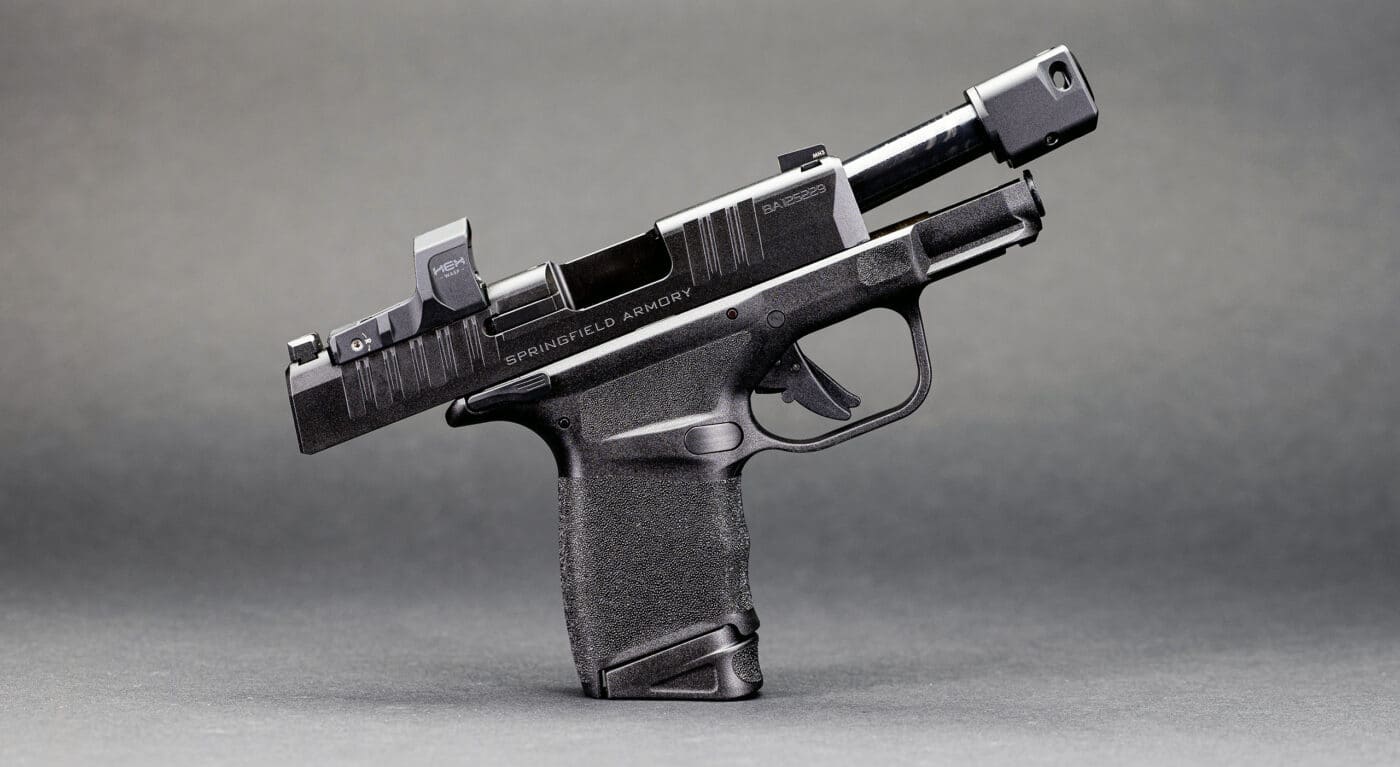
What makes the RDP compensator noteworthy is that it does not require any tools that you weren’t born with. Assembly and disassembly of the compensator entail basically screwing it onto, or off from the threaded barrel. Retention and proper orientation are achieved by a small notch on the bottom of the barrel at the rear of the threads, and a corresponding key in the compensator. This key and notch design uses a spring-loaded lever mechanism in the compensator to secure the unit in place. It does not rotate or come off while in use, and it requires no set screw.
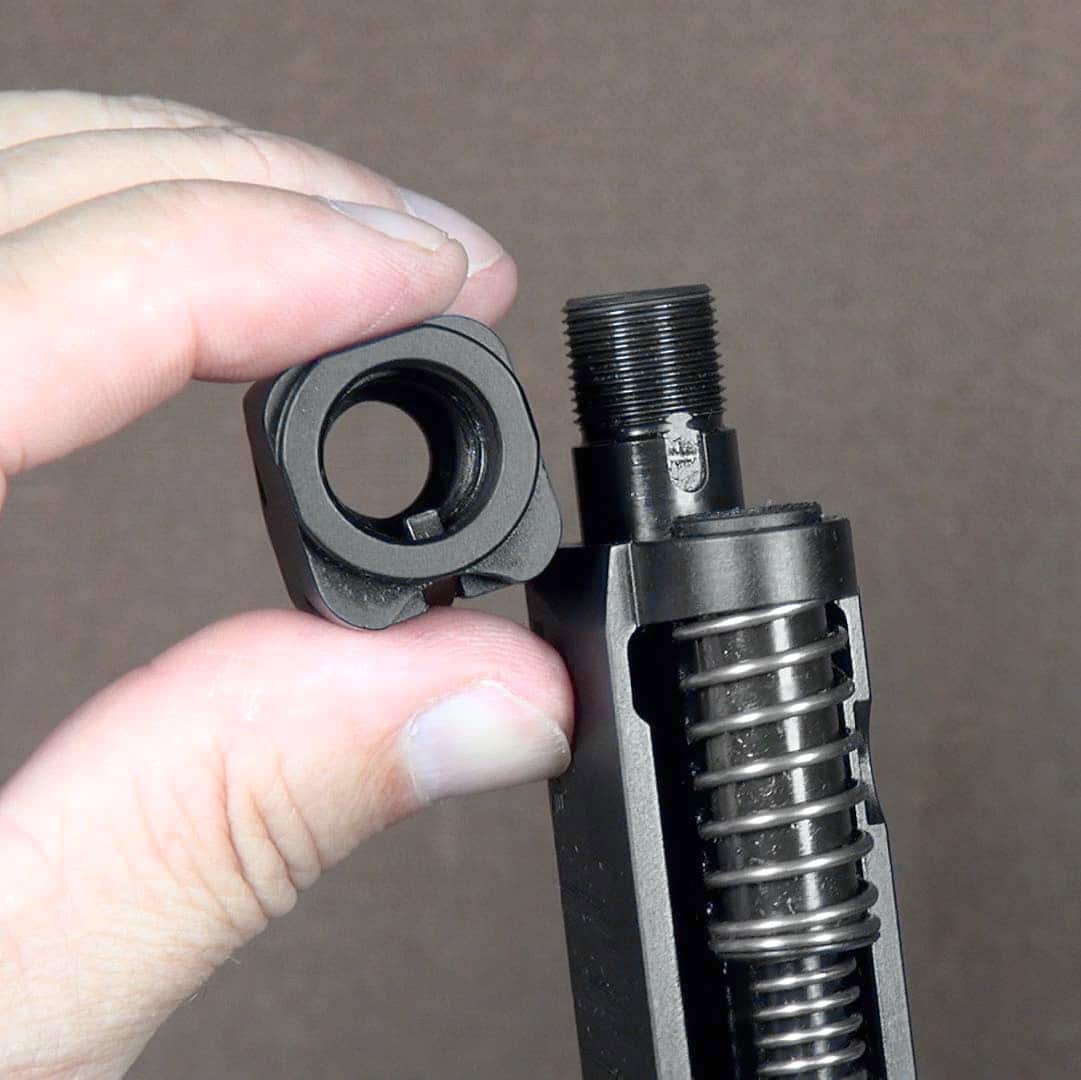
The process is simple, and a few seconds of practice the first time is about all it takes to master it. It’s easier to work with just the slide, and it’s safer too — so the first step is to clear the gun and remove the slide from the frame of your unloaded Hellcat. Set the frame aside. Turn the slide upside down, and you’ll see the small lever on the bottom of the compensator. Using the thumbnail for best results, simply push in on the forward end of the small lever to release the key, and begin turning the slide counter-clockwise. It takes about three full turns before you can release the lever, and then you simply continue to un-thread the unit until it is removed.
Re-assembly is basically a reversal of this procedure, with a couple of key steps. First, you’ll need to actuate the spring lever in order to get the compensator started onto the threads. If you don’t push that lever in, the key will impact the crown of the barrel, and it just won’t go on. Once you slide that on, just start to rotate clockwise to tighten it — all the way until it stops. Now, you’ll need to turn it back about ½ turn and use your thumb to push in the small lever. While depressing the lever, continue again to screw the compensator onto the barrel until it can go no further. It should be visibly out of alignment at this point. Release the pressure on the lever, and reverse the direction of the compensator slowly, for about ½ to ¾ turn. You will feel and hear the key catch into the notch — and at this point, your compensator is properly installed and ready to go. Verify that it does not turn in either direction and that the single port is straight up, in front of the front sight.
Does It Matter?
How effective is the compensator? As mentioned, there are a number of variables, but I did a simple test to illustrate it, using 124-gr. +P ammo, a good rest, and as consistent a grip as I was able.
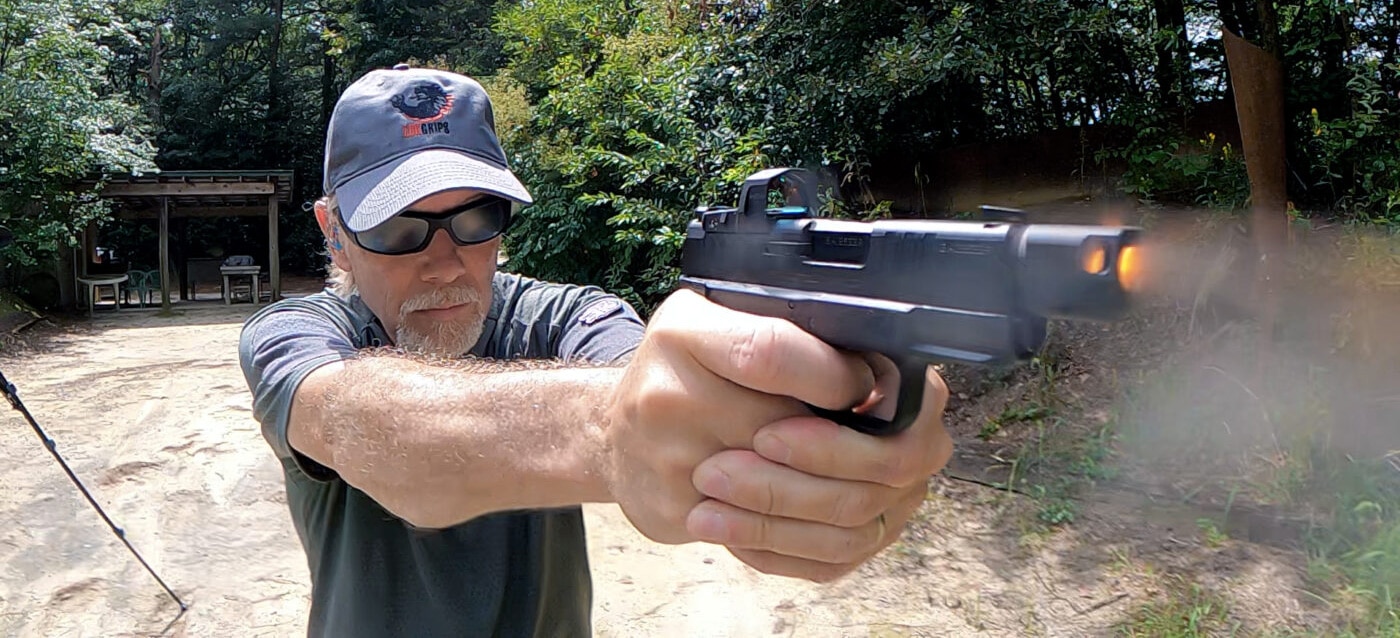
I found that there was a noticeable physical difference in the recoil of the compensated Hellcat. The non-compensated gun moved approximately 4.8” up and 5.5” back during recoil, with a muzzle rise of 48 degrees. The compensated version rose 4.2” and moved just 4.0” rearward, it’s muzzle rise being only 38 degrees. These results show that, even with my fairly crude testing procedure, the value of the compensator is apparent.
Conclusion
The results clearly show that the compensated Hellcat will save significant wear and tear on the shooter’s wrist and arm, by reducing the distance the gun travels up and back, and by also greatly flattening the angle of muzzle lift.
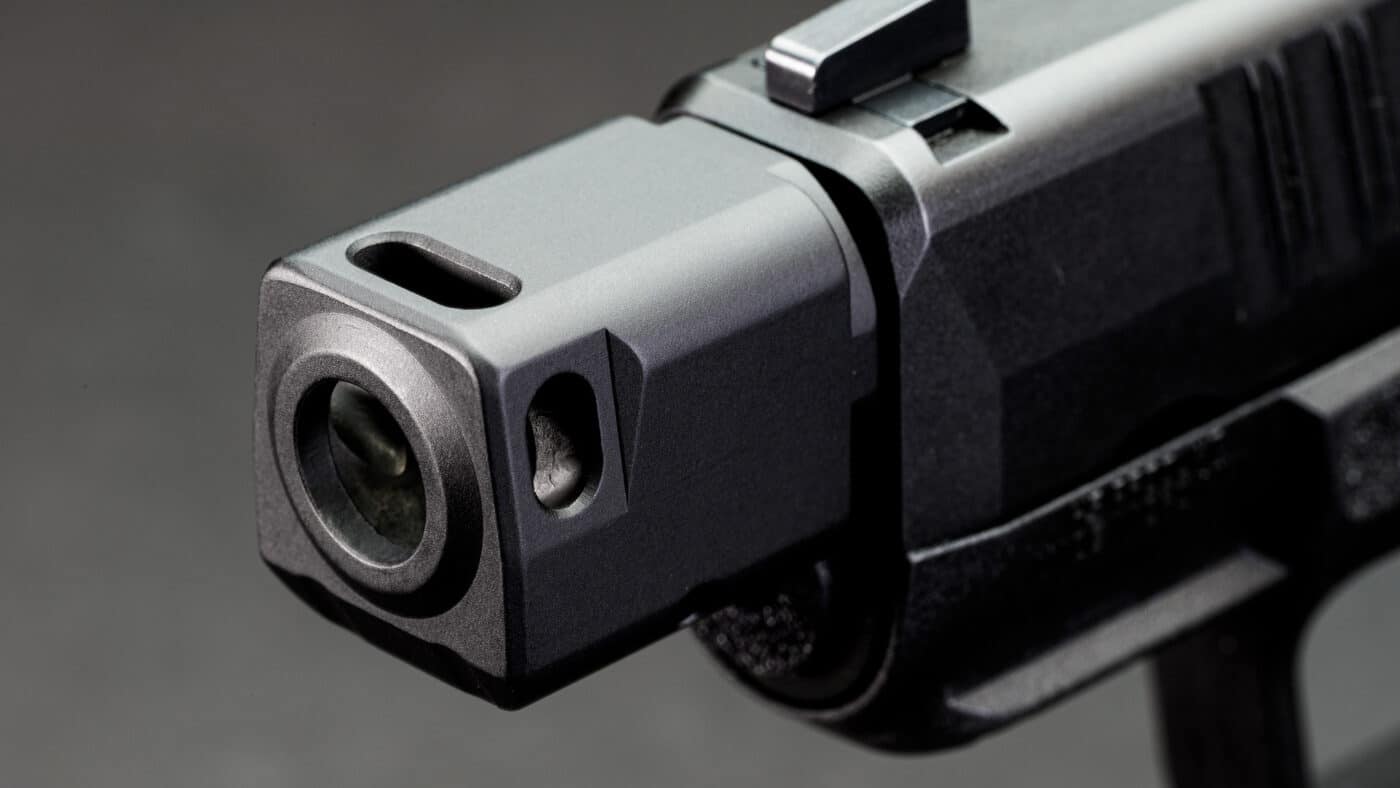
I would say that the end result tells me that a compensator like this one makes a lot of sense on a CCW pistol like the Hellcat RDP. Its ability to help tame powerful +P ammo out of a small carry pistol like this makes it a great option for the EDC user.
Editor’s Note: Please be sure to check out The Armory Life Forum, where you can comment about our daily articles, as well as just talk guns and gear. Click the “Go To Forum Thread” link below to jump in and discuss this article and much more!
Join the Discussion
Featured in this video
Continue Reading
Did you enjoy this video?

 222
222


